Teams integration
Microsoft Teams is used daily to collaborate and communicate across teams. The Cutover integration with Microsoft Teams requires access to the Microsoft Graph API. This provides the necessary information about teams and channels assigned to an MS Teams user, enabling dynamic search for a specific channel when setting up the integration in a Cutover runbook.
Using the Graph API and our Custom Integration, we will show you how to use a Cutover task in your runbook to send a message to a channel during a live execution. Once the Cutover task is triggered, a HTTP Post request will be sent to a Microsoft teams channel with your message in the payload.
Note: The configuration shared in this guide is intended to describe how to set up Cutover for the example mentioned. Use this guide as a reference to understand the changes and match to your current configuration where necessary.
Set up your integration in 6 easy steps, read on to find out how in just 9 minutes.
Prerequisites
Prior to integration set up, you must have/do the following:
- Have an understanding of how our Custom Integration works.
- In Cutover, you will need to assign both the Integration Admin and Custom Fields Admin role types to the user who is configuring the integration.
- Setup of the Azure App registration - further information on this can be found in the Authorization tab section
Steps for creating a custom integration
In order to create a Custom integration, you will need to follow the steps listed below - each step will be explained in more detail further in the guide:
- Set up your integration connection
- Add in an integration action
- Add in your integration settings in the General tab
- Create your Custom Fields
- Include the authorization type to be used by the integration requests in the Authorization tab
- Add in your request properties in the Request tab
Create a custom integration connection
Once the prerequisites are met, you can create your custom integration in Cutover by following these steps:
1. Click Settings (the cog icon at the bottom of the sidebar), then click Integrations.
2. Any previously configured custom integrations will be displayed on the Integrations Connections page.
3.To find out how to set up a custom integration or see step by step guides for some of our most requested integrations, click on Learn more at the top of the Integrations Connections page .
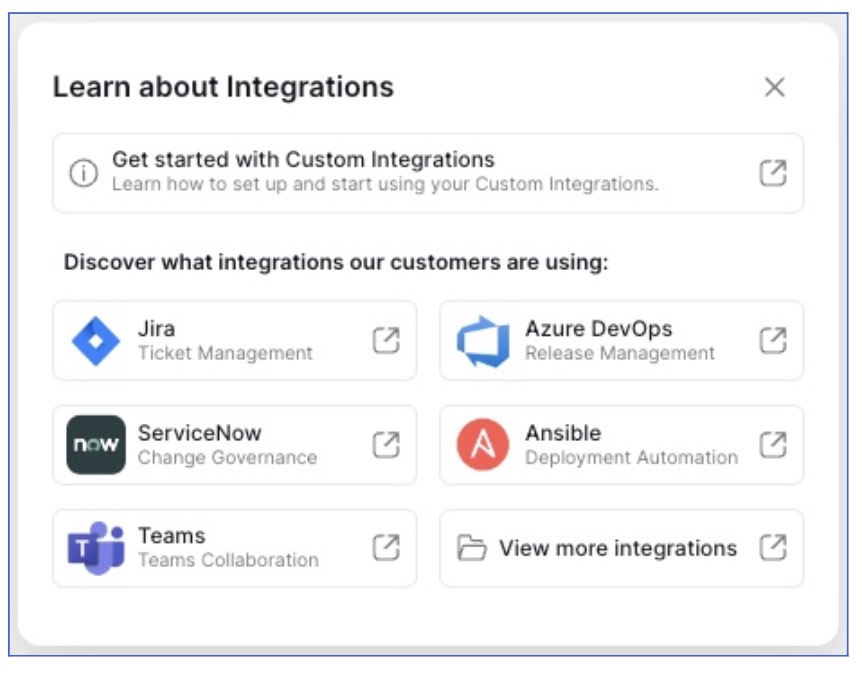
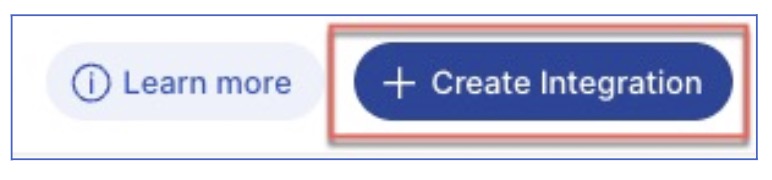
4. If you’re ready to build your integration, click Create Integration.
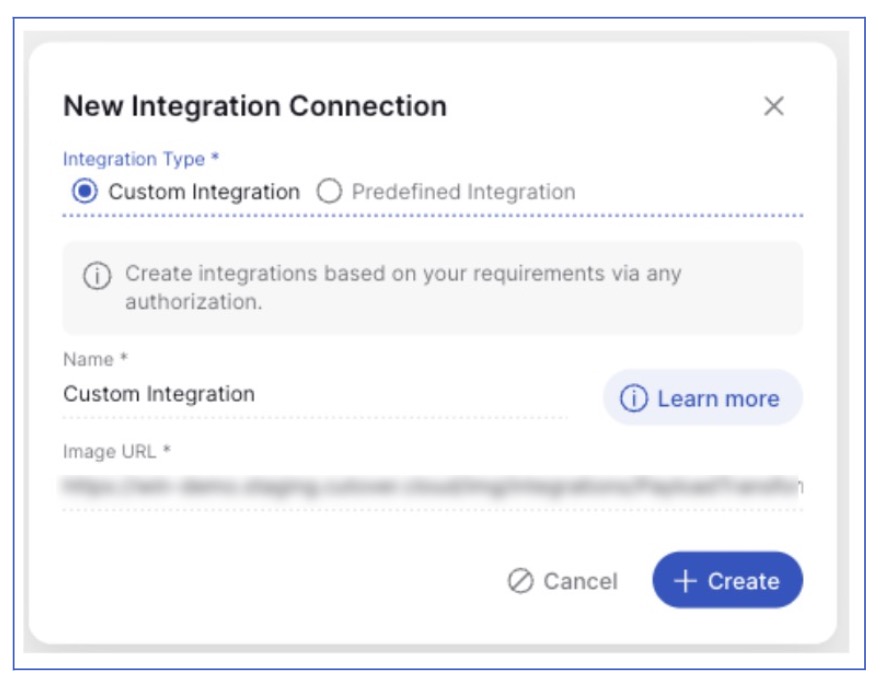
5. The New Integration Connection modal is shown. You can choose from two types of integration:
Custom integration: This type of integration gives you the flexibility to create integrations based on your requirements via any authorization.
Predefined integration: This type of integration has been set up with predefined fields and default authorization.
To find out more about the types of integration, click the appropriate radio button and then click the Learn more button inside the New Integration Connection modal window.
6. If you select the Predefined Integration radio option, select an integration from the Integration dropdown list. The information required will change depending on the integration chosen. Enter any mandatory fields and click Create.

The newly created integration will be listed at the bottom of the Integrations Connections page.
Note: As this guide is based on our Custom Integration, please see our Help Center for further information on setting up any predefined integrations.
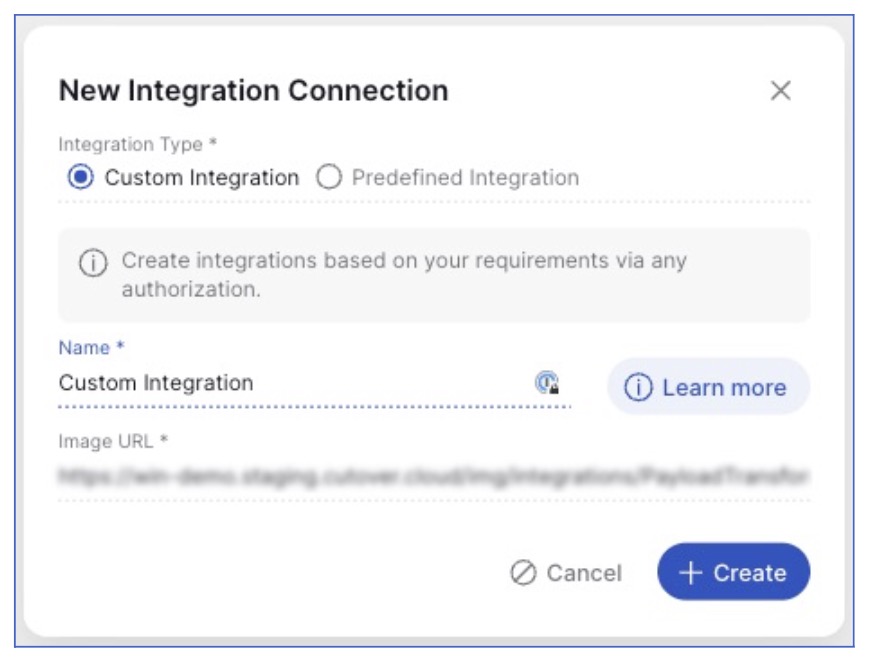
7. If you select the Custom Integration radio option, you will need to enter a name and (optionally) an image URL for your integration (if this is left blank, a default image URL will be displayed). Click CREATE.
The newly created integration will be listed at the bottom of the Integrations Connections page.
Add an integration action
This section will cover the following example where you can add in your integration action. To do this, add an integration action to your newly created custom integration connection by following these steps:
1. In Settings > Integrations, click on your new custom integration from the list in the Integration Connections screen.
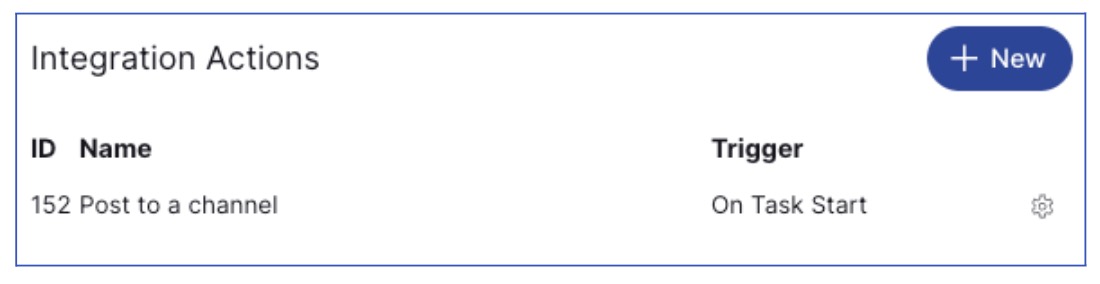
2. In the Edit panel, click + New in the Integration Actions section.
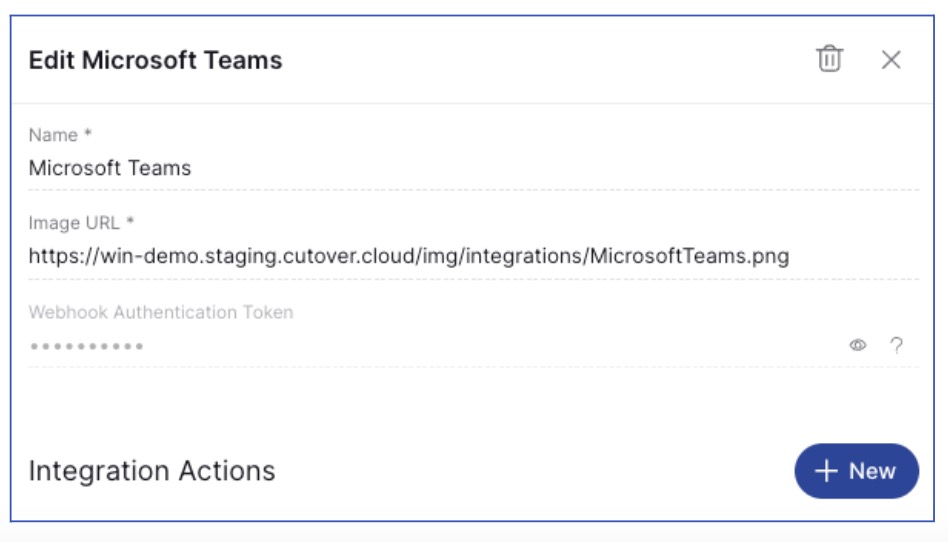
3. In the new action modal, select Build a custom integration from the Action dropdown.
General tab
In the General tab, enter the following details:
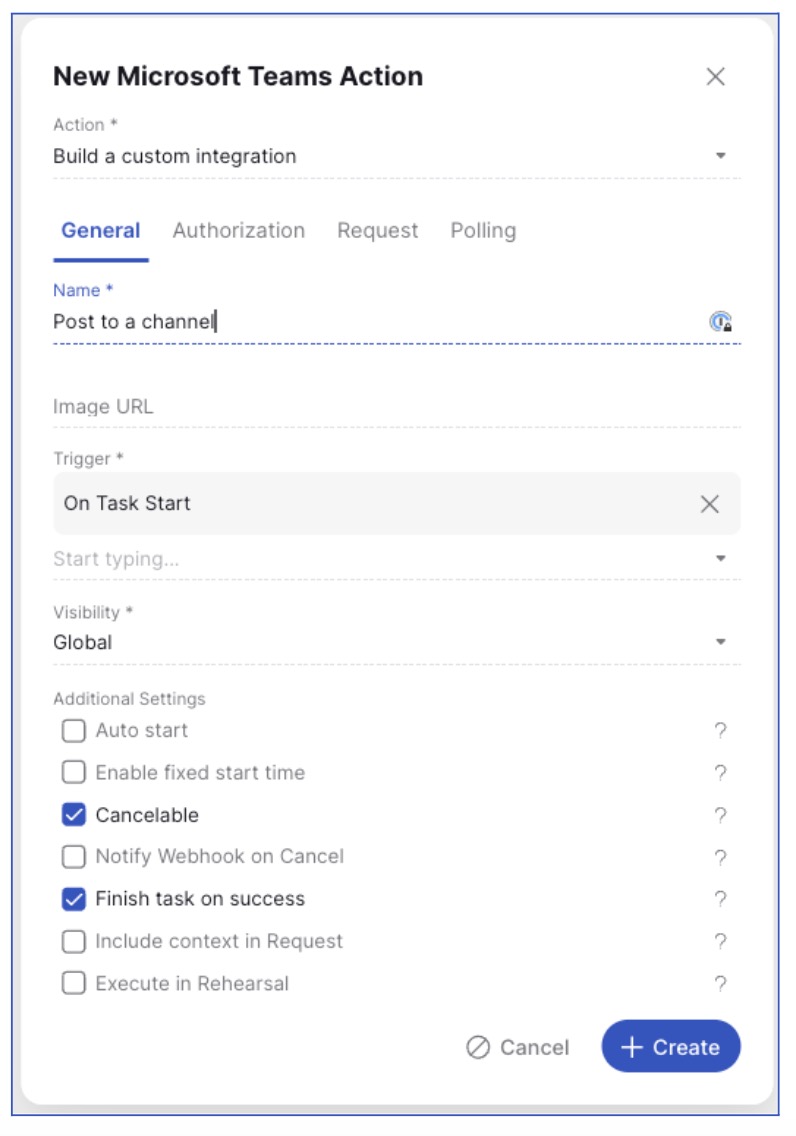
Name: Enter a name for your integration action. In our configuration, we have used the integration action name ‘Post to a channel’.
Image URL: This is the image of the icon that is associated and displayed with the integration action, in this example we have used our Microsoft Teams image - but you are able to choose an image url of your choice.
Trigger: Select On Task Start.
Visibility: Select which workspace(s) you would like your integration action to appear or select global for your integration to appear in all workspaces.
Note: You cannot change the visibility of an integration action once it has been created. Also, you will need to set up the integration action for every workspace it is required for.
Additional Settings: Ensure that cancelable and finish task on success are selected. These two options are used for the example being configured in this guide, however you may want to add additional options.
Click CREATE.
Create Custom Fields
Before filling out the rest of your integration action, you will need to set up your custom fields. In order to create your custom fields, you will need to make sure you have the Custom Fields Admin role.
Note: You can read more about creating custom fields in our Help Center.
To create a custom field:
1. Click Settings > Custom Fields.
2. Click the + icon in the bottom right to add a new custom field.
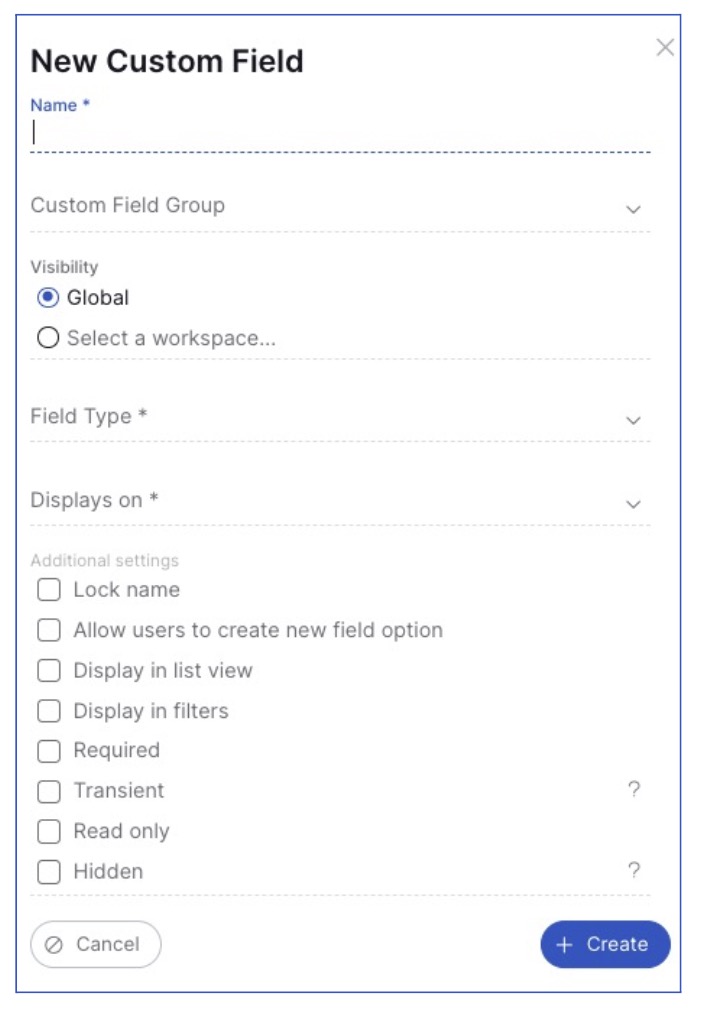
3. Add your custom field name
4. Select the visibility of your custom field
5. Select the field type (please note for single-select you will need to add the field options in there)
6. In the displays on field - select task edit
7. Under ‘Restrict to integration’, select your integration action
8. For additional settings, choose which properties fulfill your use case - in this example we have chosen Transient (this means any values stored will not be duplicated or copied) and Required.
9. Click Create (repeat this for all of the custom fields required for your integration).
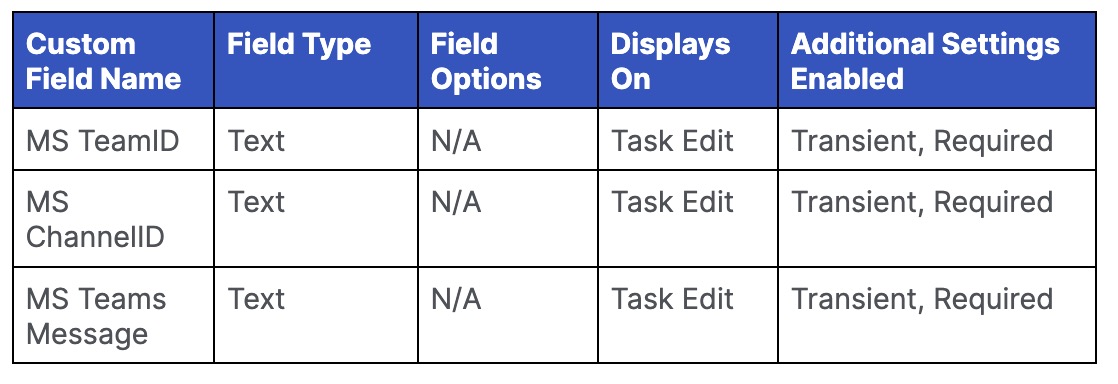
Below is a list of the custom fields, fields types and additional settings. This information should be entered when creating the custom fields in the above example:
Once the above steps are completed, you can navigate back to your integration action - Settings > Integration connection > Integration Action settings.
Authorization tab
Before filling out the Authorization tab, you will need to set up your Azure app registry.
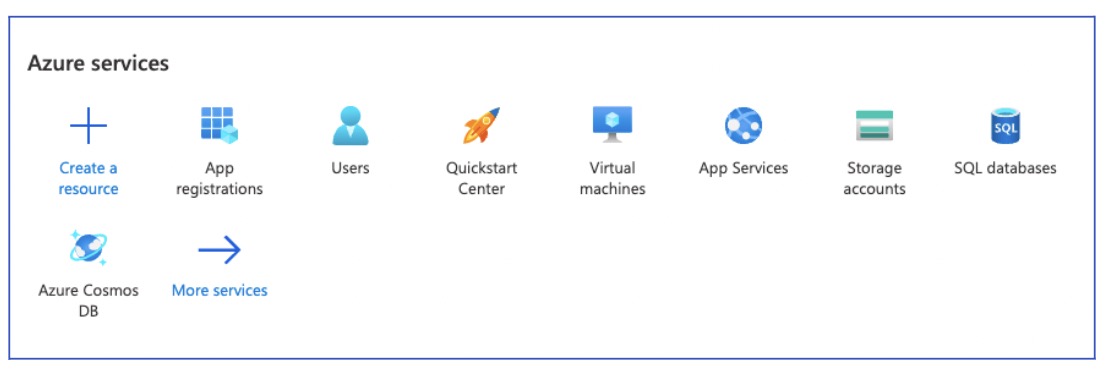
1. On your Microsoft Azure home page, select App registrations.
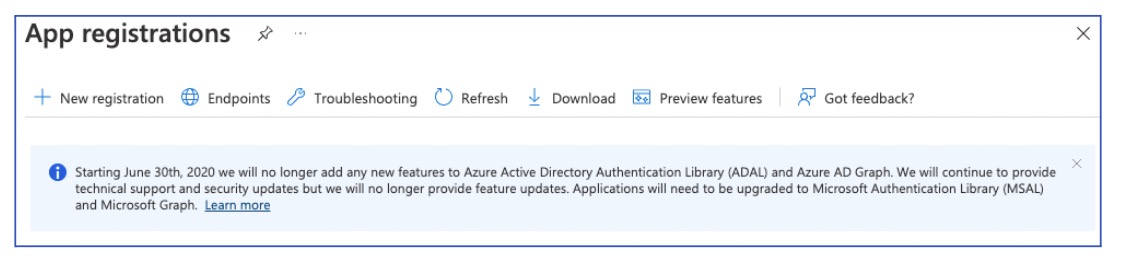
2. In the App registrations page, click on “+ New registration“
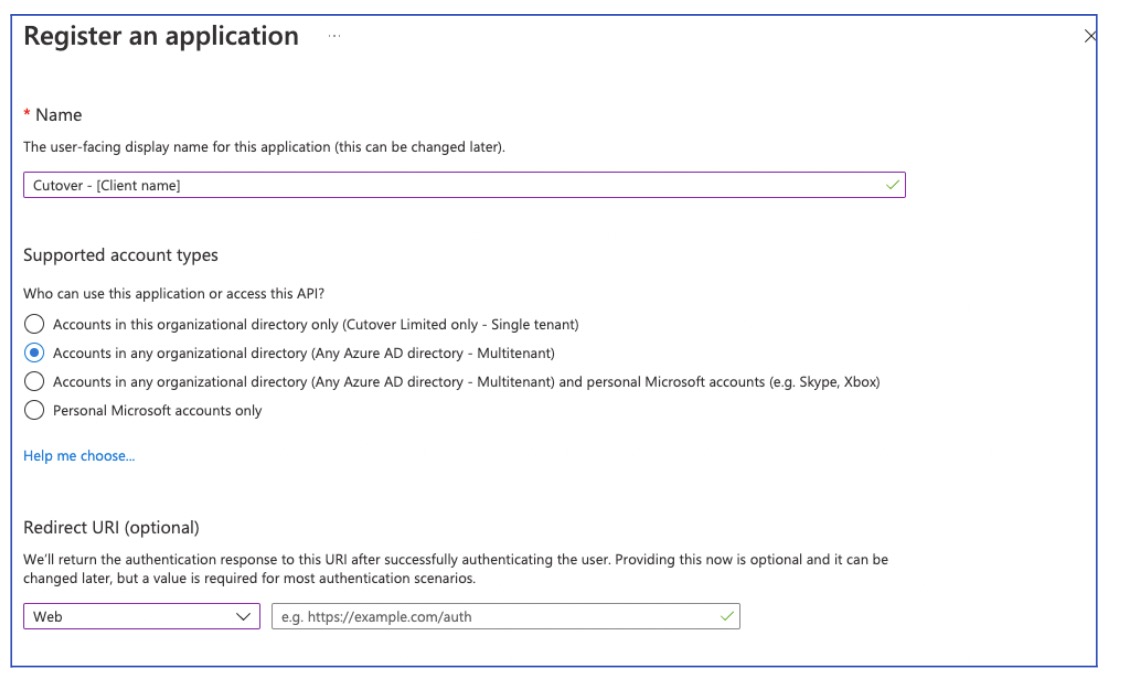
3. Register your application:
In the registration form, provide a name “Cutover - [add your company name here]“
Select “Accounts in any organizational directory (Any Azure AD directory - Multitenant)“
For the redirect URI select “Web“ and enter one or more redirect URIs for the application. The redirect URIs can be edited later if required. - The redirect uri should be in the following format - https://clientname.cutover.com/api/integrations/oauth/authentications/microsoft_graph/callback
Click on Register at the bottom of the screen.
4. The next screen will show the details of the registered application.
Note: Take a note of the value of “Application (client) ID”, as this will be needed for the OAuth Client ID when completing the Authorization tab in Cutover.
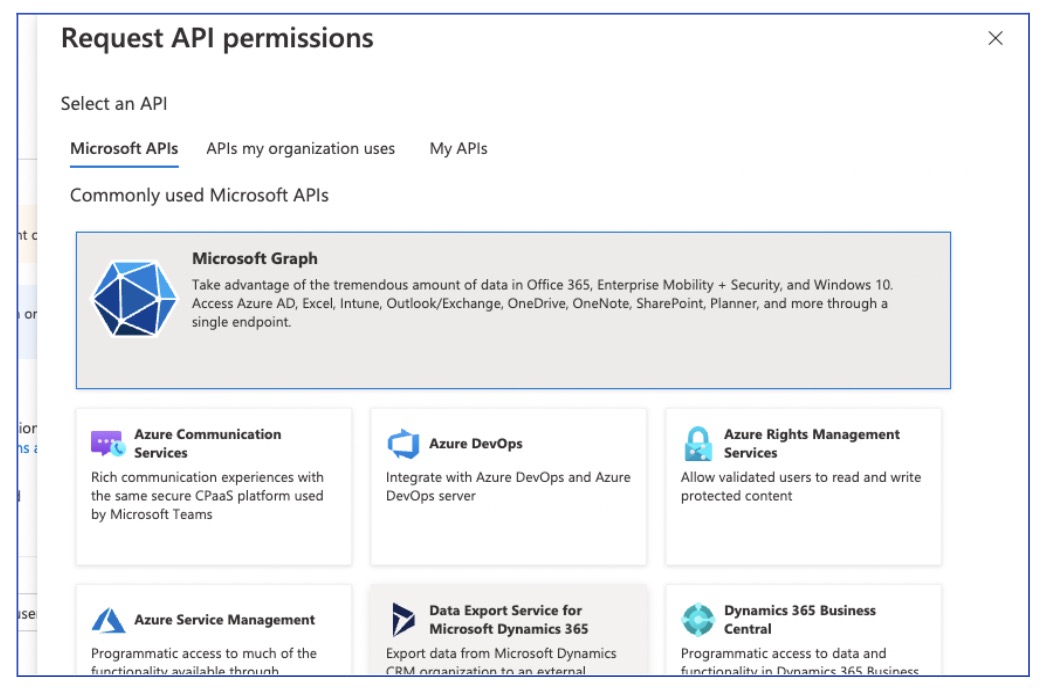
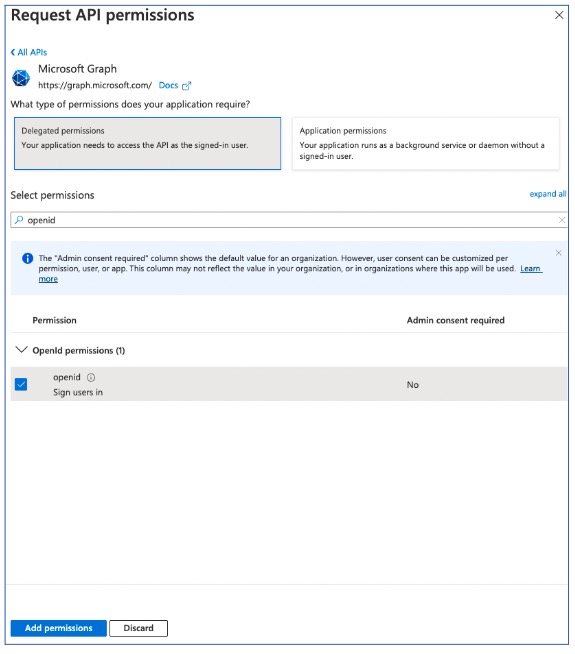
5. Now, on the left hand panel, click on “API permissions” to define the required permissions for the MS Teams to work. To do so, click on “Add a permission“ then select the “Microsoft Graph“ banner and then click “Delegated permissions“.
6. Use the search functionality to search for the following permissions:
Channel.ReadBasic.All
ChannelMessage.Send
offline_access
open id
profile
Team.ReadBasic.All
user.read
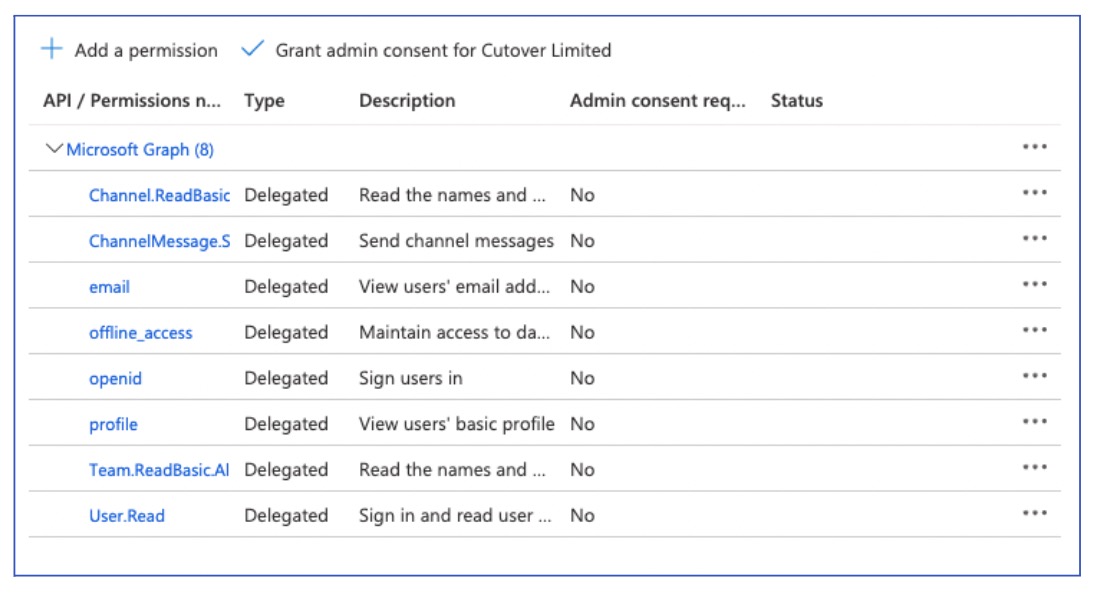
7. Once each permission has been found click the checkbox to select it. Do this to all permissions and once this is done, click on “Add permissions“ on the bottom left.
8. The permission screen should now look like the following:
9. Now it’s time to create an app secret. Click on “Certificates & secrets“ from the left navigation and then click on “New client secret.“ For “Description“ enter “Cutover“ and set the expiry to “24 months“
10. Click on the copy icon to copy the “Value“ of the secret.
Note: Make a note of the value of the secret as this will be the only time you see this. This will be used as the OAuth “Client Secret” when completing the Authorization tab in Cutover.
We are now ready to complete the Authorization tab back in Cutover. In this example we are using OAuth authorization.
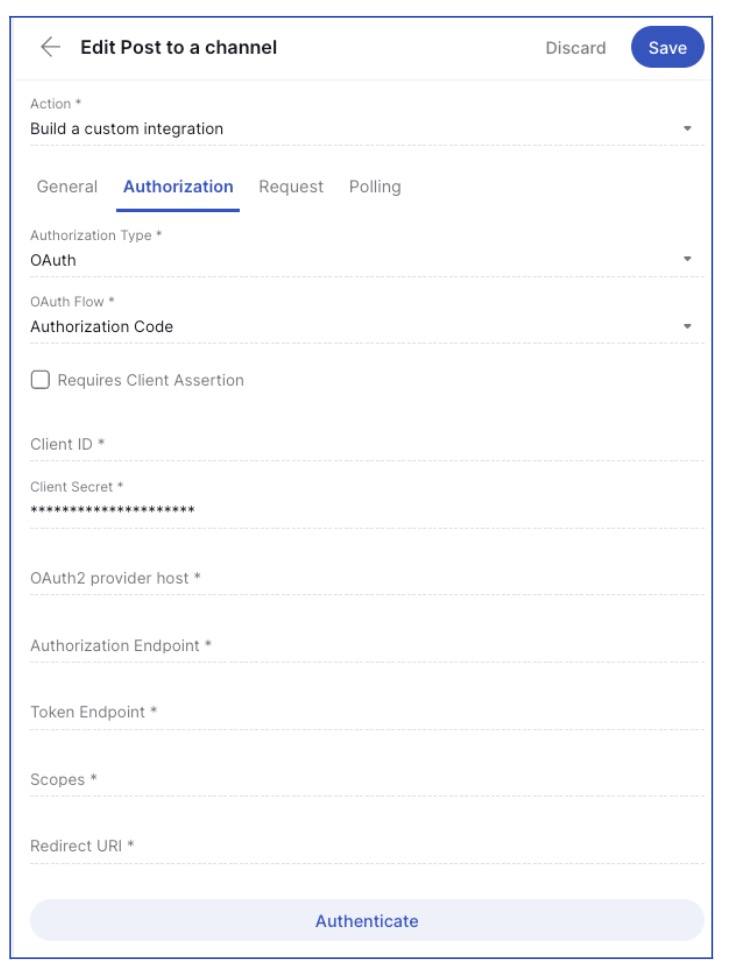
Authorization Type: OAuth
Authorization Flow: Authorization Code
Client ID: The ID provided by the third party OAuth provider.
Client Secret: The secret associated with the client ID.
OAuth2 provider host: https://login.microsoftonline.com
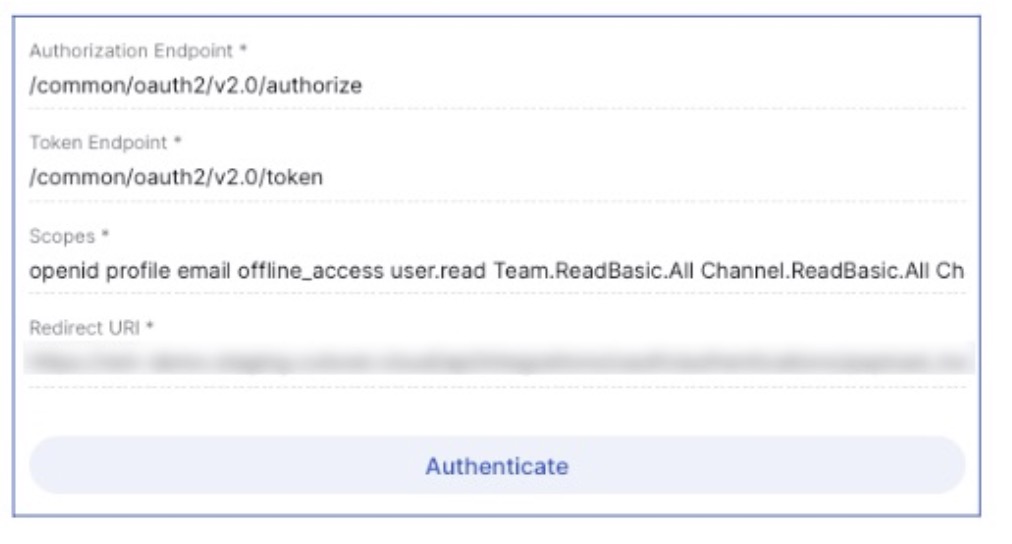
Authorization Endpoint: /common/oauth2/v2.0/authorize
Token Endpoint: /common/oauth2/v2.0/token
Scopes: openid profile email offline_access user.read Team.ReadBasic.All Channel.ReadBasic.All ChannelMessage.Send
Redirect URI: https://{Client Instance}/api/integrations/oauth/authentications/payload_transformer/callback
Authenticating as a functional user
When authenticating as a functional user, the same user’s credentials are used each time the integration is executed. To authenticate as a functional user, click on the ‘Authenticate’ button in the OAuth tab of the Custom Integration.
Once this is done it will look like this:
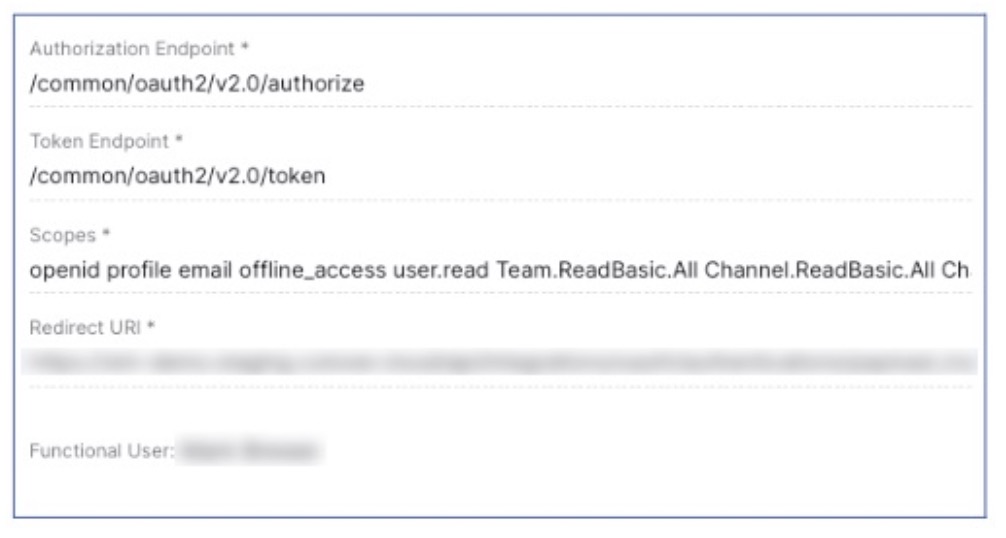
Note: This is a one off activity and re-authentication will not be required when executing a task.
Authenticating as a task user
When authenticating as a task user, each individual who wants to execute the integration will need to authenticate. When required, each user can do this by navigating to the task in the runbook and clicking on the ‘Authenticate’ button.
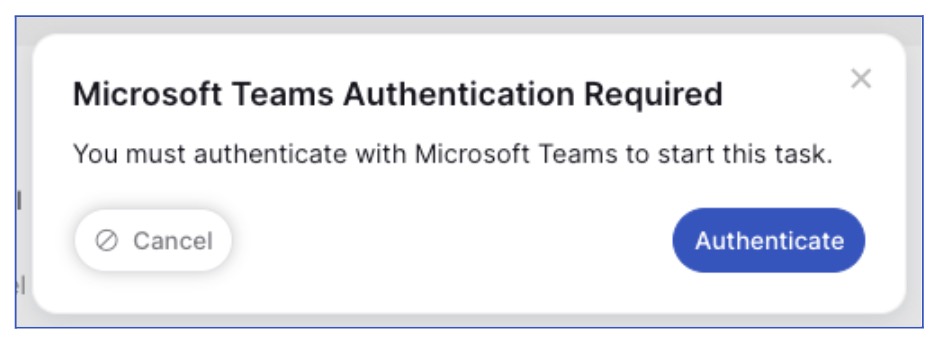
Note: Every time a new runbook is created, and the task is added into the runbook - a user will need to authenticate.
Request tab
1. Select your chosen request type, in this example we are using a HTTP POST request.
2. Enter the API URL: https://graph.microsoft.com/v1.0/teams/{team-id}/channels/{channel-id}/messages
Please note in our example we have used dynamic fields for the team-id and channel-id e.g: https://graph.microsoft.com/v1.0/teams/{{CustomField['MS TeamID']}}/channels/{{CustomField['MS ChannelID']}}/messages
Note: In the URL we have used dynamic fields for the Pipeline ID. To find out more about dynamic fields, click here to visit our Help Center.
3. In the request header, fill in your request headers as defined by Microsoft Graph.
{"Content-Type": "application/json","Accept": "application/json"}
4. Fill in your outbound payload (please note this is an example of our payload using our required fields):
{"body": {"contentType": "text","content": "{{CustomField['MS Teams Message']}}"}}
5. In the ‘Execution mode’, set this to fire and forget.
Click Save.
Next steps
In this guide you have learned how to successfully build and set up the Teams integration. By following the steps, you should now have a functional integration. You should thoroughly test your integration and address any issues that may arise during the testing phase.
We encourage you to maintain detailed documentation of your integration configuration and any changes you make in the future. This will be invaluable for troubleshooting and maintenance.
If you are interested in integrations and would like to create further integrations in Cutover, please get in touch with your Customer Success Manager (CSM).
If you would like to know more about Cutover please contact info@cutover.com.
Thank you for using this guide, and we wish you every success with your integration project. If you have any feedback or suggestions for improving this documentation, please feel free to send it to docs@cutover.com.