Manage ServiceNow Groups in Cutover
Last updated: October 7th, 2024
Problem Statement
A vast number of organizations today utilize ServiceNow to manage their ITSM processes. ServiceNow is the single source of truth across many of the ITSM processes including groups, and members are required to be synchronized to third party systems such as Cutover. This is vital as it will allow teams to instantly manage their runbooks and complete tasks through their critical processes.
Solution
It is good practice to eliminate any manual data synchronization processes, once such activity is the synchronization of ServiceNow Groups and Cutover Centralised Teams. The Cutover API can be leveraged in ServiceNow business rules so that you can trigger:
- The creation of a centralized team from a newly created ServiceNow Group.
- Delete a centralized team when a ServiceNow group is deleted.
- Using our Lambda function, update your Centralized Team membership when members are updated in ServiceNow Groups.
This functionality will ensure your ServiceNow Groups and Cutover Centralized Teams are always aligned.
Here's how you can use the Cutover API in ServiceNow as demonstrated in the video below.
Key Benefits
- Centralized teams are always up to date
- Reduce admin time creating Centralized Teams
- Both ServiceNow and Cutover are always aligned
Recipe
Configuring your ServiceNow Business Rules
This section provides guidance on how to create your ServiceNow business rules. The business rules will trigger when you create, update or delete your ServiceNow Groups and the changes will reflect in your Cutover centralized teams. This all happens in real time.
Note: The code supplied for each business rules are samples. Please ensure you amend the code as required for each of the scenarios.
Prerequisites
1. You will need to ensure you’re a ServiceNow Administrator with ability to manage business rules, ServiceNow fields, REST API explorer and groups. Please refer to the ServiceNow Documentation for detailed roles.
2. You will need Workspace Manager or Centralized Team Manager in the appropriate workspace to create, update and delete your centralized teams.
3. A lambda will need to be deployed in order to update the centralised team membership. Please reach out to your CSM for more information.
Steps for creating the ServiceNow Business Rules
In order to create the ServiceNow business rules, you will need to follow the steps below:
1. Create two ServiceNow Group fields. The ServiceNow Group fields can be named the following:
- Centralized Team ID.
- Cutover Workspace.
2. Create three ServiceNow business rules, you can name them the following:
- Create Centralized Team
- Update Centralized Team
- Delete Centralized Team
3. Test your Business Rule.
Create two ServiceNow custom fields
Note: The steps listed below may differ depending on your ServiceNow setup. Please refer to your ServiceNow documentation guide for both creating group fields and configuring business rules.
Once the prerequisites are met, you can create your ServiceNow Group fields by following these steps:
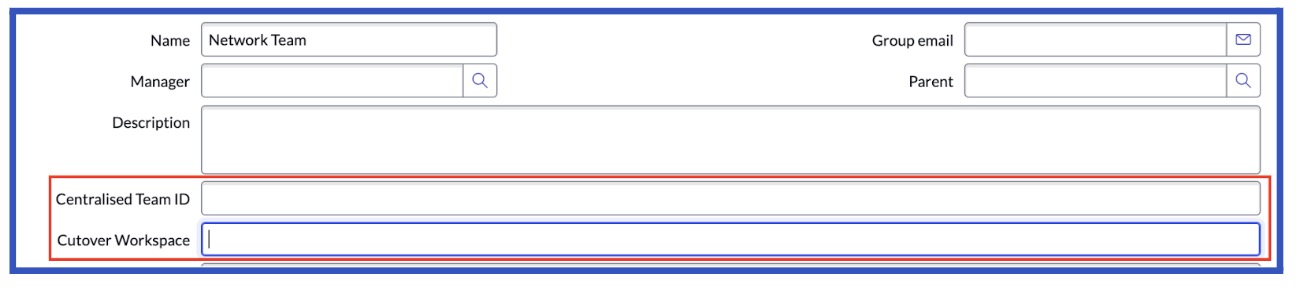
1. Navigate to the Groups Interface under System Security in ServiceNow:
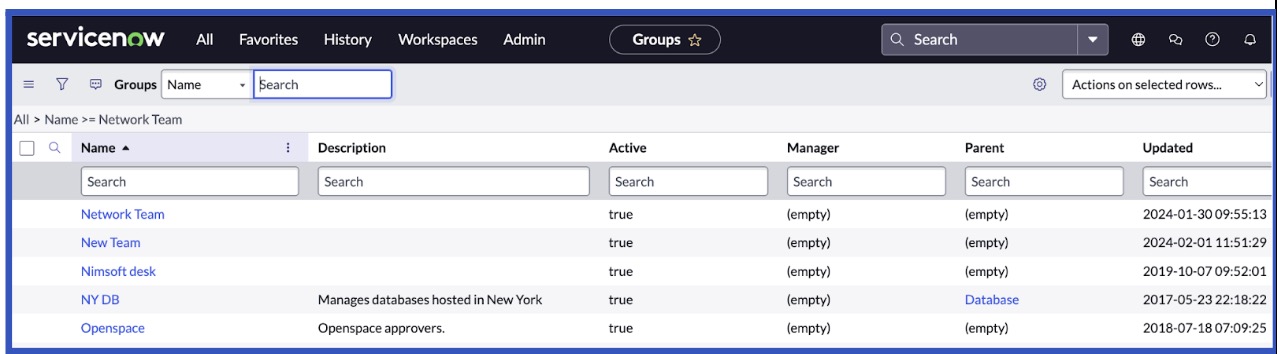
2. Click on any Group that you have created. In the example above we will click on Network Team > Additional actions.
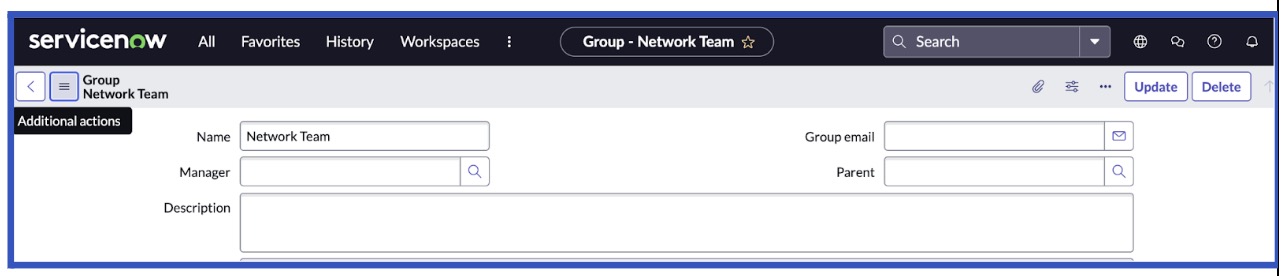
3. On the Additional actions drop down > Click Configure > Select Form Layout. You will be presented with the configuring group form:
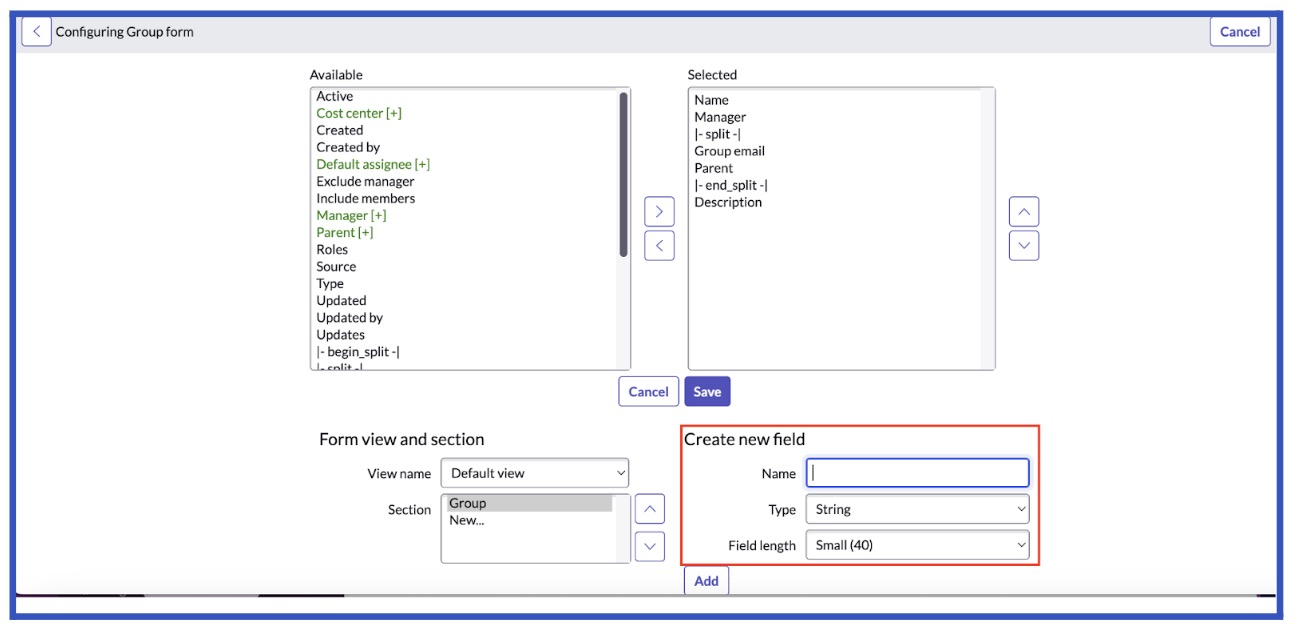
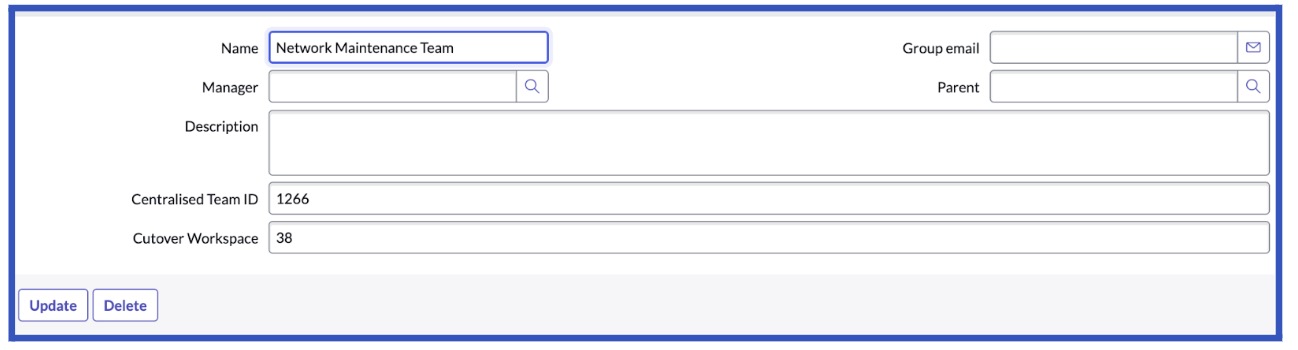
4. In the bottom right hand corner you will see Create new field as highlighted in the screenshot above. Please create two fields with the following names:
- Centralized Team ID
- Cutover Workspace.
Note: You will need to ensure both new fields are selected as shown below:
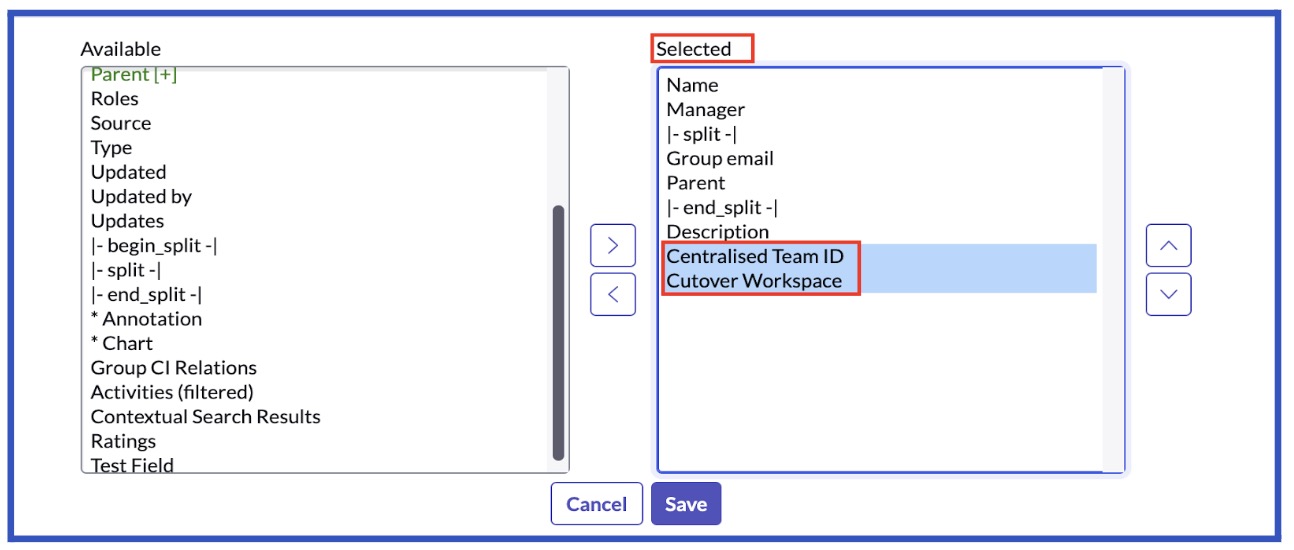
5. You will need to ensure both new fields are selected as shown below and then click Save.
Note: When creating a new Group in ServiceNow you need to populate the Cutover Workspace field with the Workspace ID. This will replicate the ServiceNow group in Cutover as a Centralized team and will be placed in the correct Cutover Workspace.
Executing the List Workspaces API will retrieve the ID of the workspace.
6. You will now need to locate the attribute names associated with the two fields Centralised Team ID and Cutover Workspace. In ServiceNow Navigate to Rest API Explorer > On the left select Retrieve records from a table (GET) > Set Value in the tableName as Group(sys_user_group) as shown below:
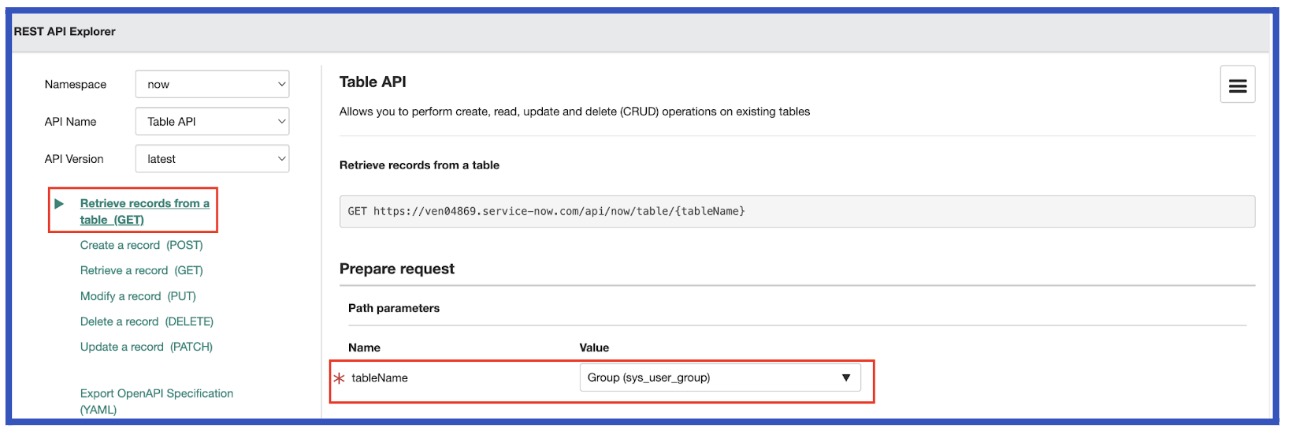
7. Scroll to the middle of the page and click send. In the Response Body you will be able to identify the attribute names. In this example Centralised Team ID and Workspace ID is stored as:
- u_centralised_team_id
- u_cutover_workspace
Please take a note of the attributes as they will be referenced in the business rules as variables.
Create a Centralized Team Business Rule
This business rule will create a centralized team from a newly created ServiceNow Group. When the business rule is triggered the newly created centralized team ID will be stored in the centralized team ID field in ServiceNow.
1. Navigate to System Definition - Business Rules > click New.
2. You will see a page as shown in the screenshot below:
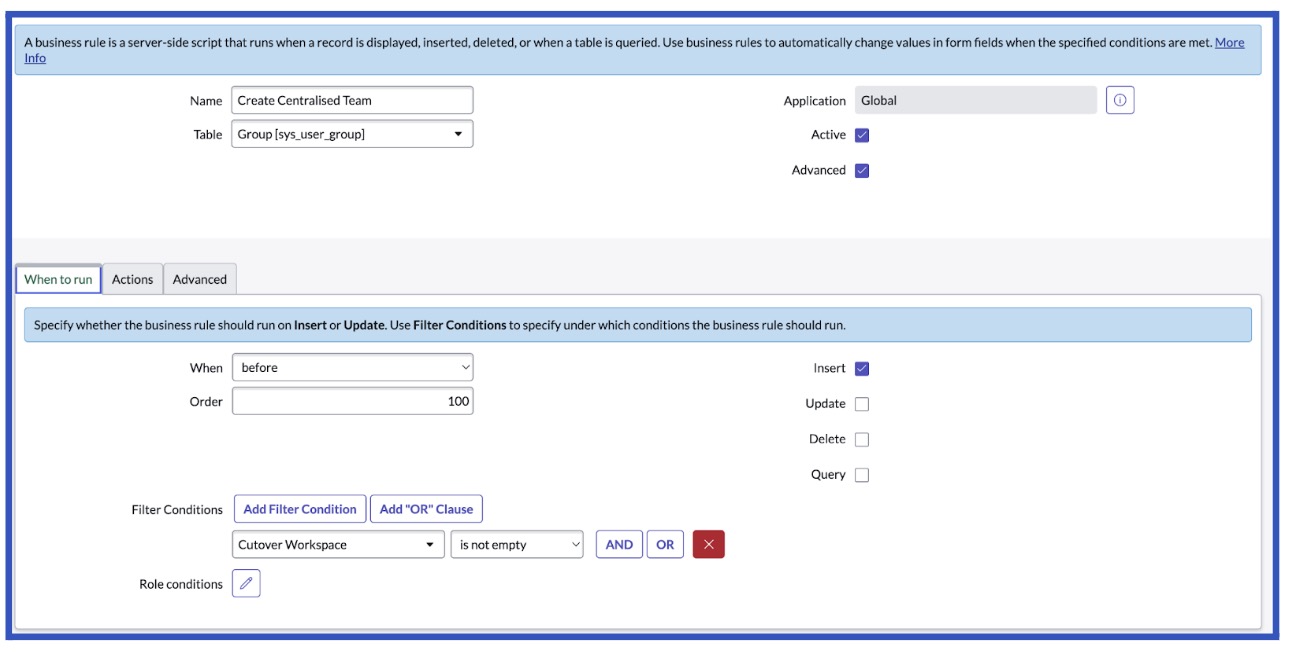
In the When to run section update the business rule to reflect the changes shown in the screenshot above. Note: The business rule will only trigger when the Cutover Workspace field is populated. This has been set in the filter conditions section.
Executing the List Workspaces API will retrieve the ID of the workspace for you to enter into the Cutover Workspace ServiceNow field.
3. Click on the Advanced tab and paste the sample code (please adjust as required) in the script section. You will need to ensure you set the correct variables, cutover base url and bearer token.
4. Please ensure you have saved your Business Rule.
Test your create centralized team business rule.
1. Navigate to the Groups Interface > New (Create a new group ensuring you have populated the Cutover Workspace with an ID) > Click Submit.
2. Login to Cutover > Navigate to the Workspace that was populated in the Cutover Workspace textbox in ServiceNow > click Central Teams. You can now see your newly created Centralized Team in Cutover:
Update Centralized Team business rule
This business rule will update a centralized team name when the name of a ServiceNow group has been updated.
1. Navigate to System Definition - Business Rules > click New.
2. You will see a page as shown in the screenshot below:
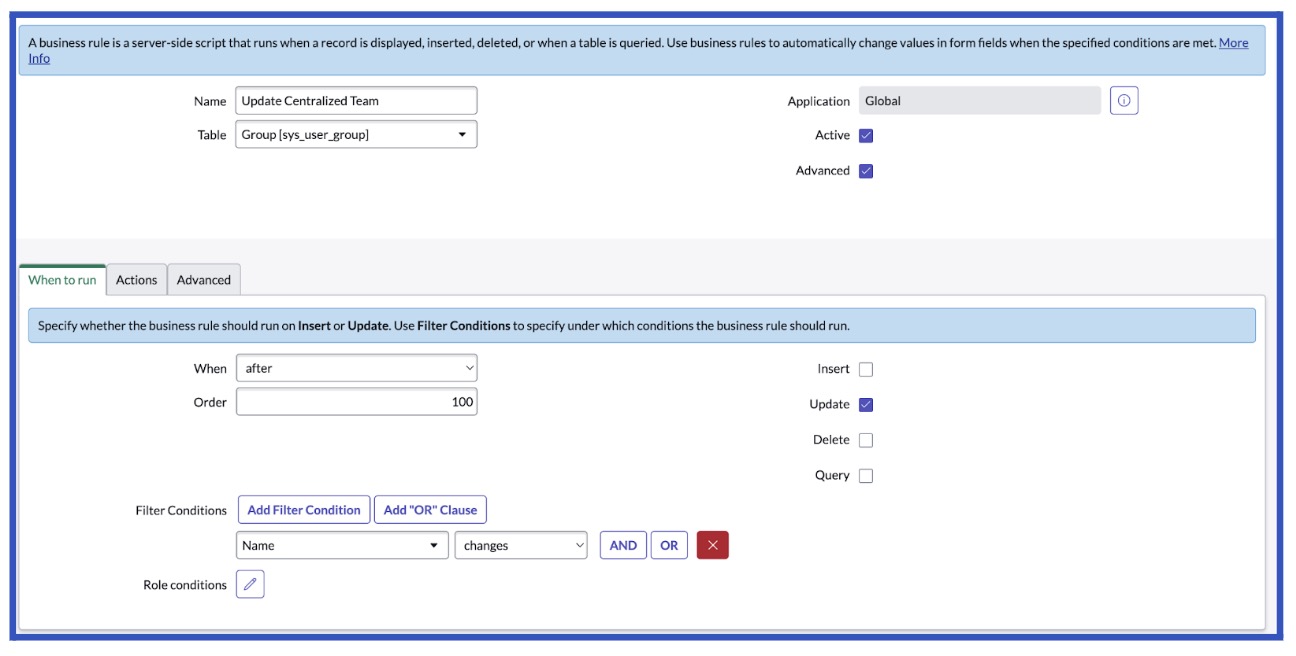
In the When to run section update the business rule to reflect the changes shown in the screenshot above.
Note: The business rule will only trigger when the group Name field is updated.This has been set in the filter conditions section.
3. Click on the Advanced tab and paste the sample code (please adjust as required) in the script section. You will need to ensure you set the correct variables, cutover base url and bearer token.
4. Please ensure you have saved your Business Rule.
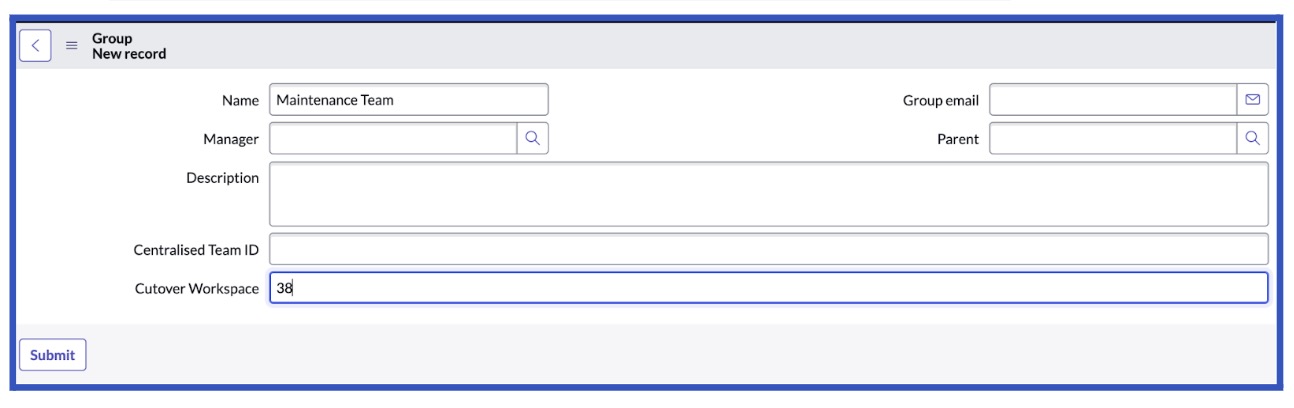
Test your Update Centralized Team business rule
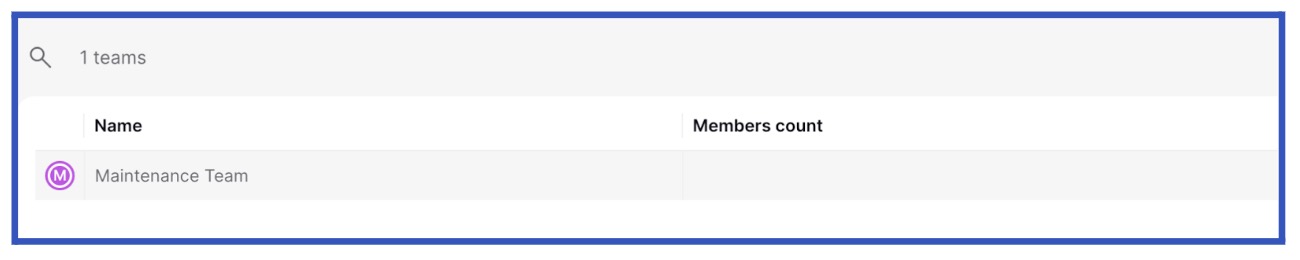
1. Navigate to the Group Interface > identify a group which needs to be renamed (the name of the group in this example was originally Maintenance Team) > Update the Name field > Click Submit.

2. Login to Cutover > Navigate to the Workspace that was populated in the Cutover Workspace textbox in ServiceNow > Central Teams. You can now see your updated Centralized Team:

Note: In order to update the membership of a Centralized Team, a lambda will need to be deployed. Reach out to your CSM for more information, this will work in conjunction with the business rules.
Delete Centralized Team Rule
This business rule will delete a centralized team when a ServiceNow group has been deleted.
1. Navigate to System Definition - Business Rules > click New.
2. You will see a page as shown in the screenshot below:
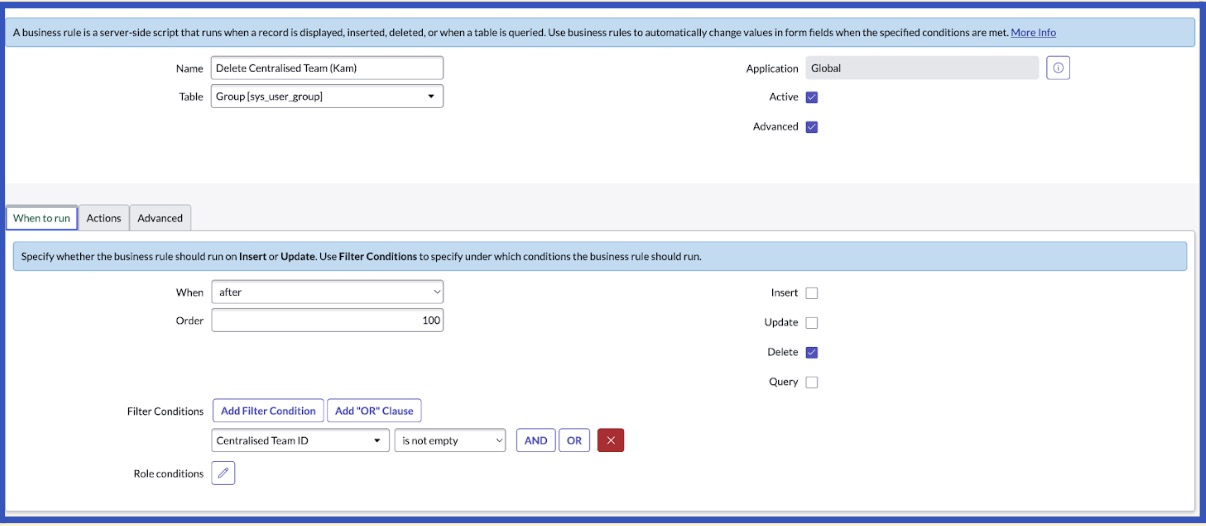
In the When to run section update the business rule to reflect the changes shown in the screenshot above. Note: The business rule will only trigger on a group that has a centralized team ID populated. This has been set in the filter conditions section.
3. Click on the Advanced tab and paste the sample code (please adjust as required) in the script section. You will need to ensure you set the correct variables, cutover base url and bearer token.
4. Please ensure you have saved your Business Rule.
Test delete Centralized Team business rule
1. Navigate to the Group Interface > Identify a group which needs to be deleted > Click Delete.
2. Login to Cutover > Navigate to the Workspace that the centralized team was created in. You can now see that the Centralized Team no longer exists.

Available endpoints